OpenShift Origin 4.0 on CentOS 6.5
Summary:       How to setup the OpenShift Origin 4.0 on CentOS 6.5
Name:          stepbystep_oo-installation
Version:       1.1.0
Release:       1.20131223
Group:         Network/Cloud/PaaS
License:       CC
URL:
Authur:        MrChoke
Source0:       http://openshift.github.io/documentation/oo_deployment_guide_comprehensive.html
Requires:      VirtualBox
Requires:      CentOS
Requires:      OpenShift Origin
Changelog
* Tue 10 Dec 2013 MrChoke <[email protected]> Release this document 1.0
* Mon 23 Dec 2013 MrChoke <[email protected]> Update some config
* Fri 18 Jul 2014 MrChoke <[email protected]> Update to OpenShift Origin 4.0
เกริ่นนำ
เอกสารนี้เป็นการต่อยอดจากเอกสารฉบับเดิมเกี่ยวกับการติดตั้ง OpenShift Origin ซึ่งฉบับเดิมเป็นการติดตั้ง Nightly ซึ่งขณะนี้เอกสารได้ล้าสมัยไปเรียบร้อยแล้วเพราะมีบางอย่างไม่สามารถใช้ได้เหมือนเดิม และ เอกสารฉบับนี้เป็นการแนะนำวิธีติดตั้งรุ่น 4.0 ซึ่งเพิ่งจะปล่อยออกมา (ยังไม่เป็นทางการ ณ 18 ก.ค. 57)
เนื้อหาอ้างอิงที่ศึกษามา
- เริ่มอ่านจากที่นี่ http://blog.redlinesoft.net
- ตัดสินใจเลือกวิธีจากที่นี่ http://openshift.github.io
เครื่องมือ
ออกแบบระบบ
domain example.com
เคยคิดจะเปลี่ยนเป็นอย่างอื่นนะ แต่พบว่าระหว่างที่เรายังไม่ค่อยรู้อะไรให้ใช้ตามที่เค้าบอกอะดีที่สุดครับ ไม่ต้องมาพวงเปลี่ยนชื่อ อาจจะทำให้เกิด bug ได้ง่าย ๆ พอทำเป็นแล้วไป deploy จริง ๆ ค่อยใช้ชื่อ domain จริง ๆ กัน ระบบนี้ผมจะแยก ระหว่าง broker และ node แต่ไม่แยก Messaging Server (ActiveMQ) ออกมาซึ่งจะไว้ใน broker บางคนแยกออกไปอีกตัวหนึ่งก็มี หรือจะรวมทุกอย่างทั้ง broker และ node ไว้ด้วยกันก็ได้ แต่แนะนำว่าหัดทำแยกไว้นะแหละดีครับ node สามารถทำได้หลายตัวได้ ในที่นี่ผมจะไม่ตั้งค่า DHCP Server นะครับเพราะใช้ VirtualBox ทำให้แทน
vm1 broker.example.com
- DNS Server
- MongoDB
- ActiveMQ
- MCollective Client
- OpenShift Broker
- OpenShift Console
vm2 node.example.com
- Mcollective Server
- Node Host
- HAProxy
เตรียมระบบ
VirtualBox
ติดตั้ง VirtualBox ตามปกติ ของผมใช้บน OS X 10.9 โดยตั้งค่า Host-only Network เตรียมไว้ดังนี้
VirtualBox -> Preferences… ->Network ->Host-only Network
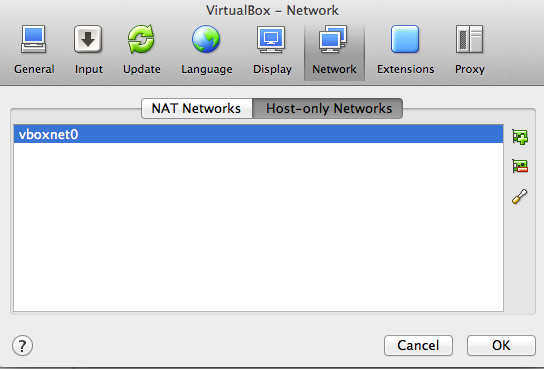
add remove vboxnet
รูปที่ 1 VirtualBox Network add Host-only Network
ให้ทำการเพิ่ม interface vboxnet0 ถ้าเคยทำไว้แล้วอาจจะเพิ่มใหม่ เป็น vboxnet1 2 3 ก็ว่าไปครับ หลังจากนั้นให้ตั้งค่า vboxnet สำหรับค่า IP และ dhcp server
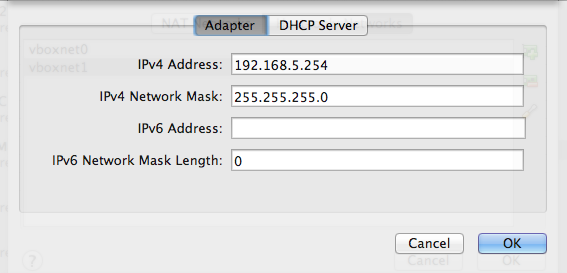
Host-only adapter Setting
รูปที่ 2 ตั้งค่า Adapter
ตรง Adapter ให้ตั้ง IP ของ vboxnet0 ถ้ามองจาก Guest VM ก็คือ IP ของ Host OS นั่งเอง ผมตั้ง 192.158.5.254
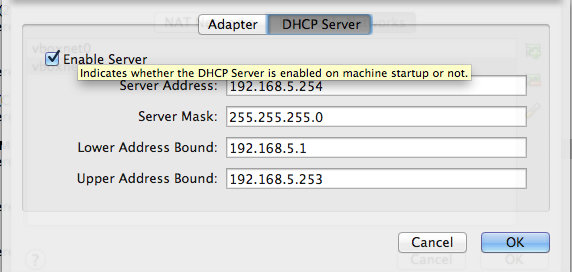
DHCP Server Setting
รูปที่ 3 ตั้งค่า DHCP Server
เป็นการตั้งค่า DHCP Server เพื่อแจก IP ให้กับ Guest VM ทั้ง Broker และ Node vm ตัวไหน ติดตั้งและ boot ขึ้นมาก่อนก็จะได้ IP ไปตามลำดับนะครับ
เพิ่ม Guest OS
ขณะเขียนบันทึกนี้ 6 ธ.ค. 56 ISO ยังมีแค่ 6.4 http://mirror1.ku.ac.th/centos/6.5/isos/x86_64/ ให้เลือกแบบ x86_64 minimal นะครับเอาแค่นี้พอ เมื่อ download มาเสร็จเรียบร้อยให้ทำการสร้าง Guest OS ใน VirtualBox ตั้งชื่อตามใจชอบ และเลือกชนิดเป็น Linux และ รุ่นเป็น Red Hat (64bit)
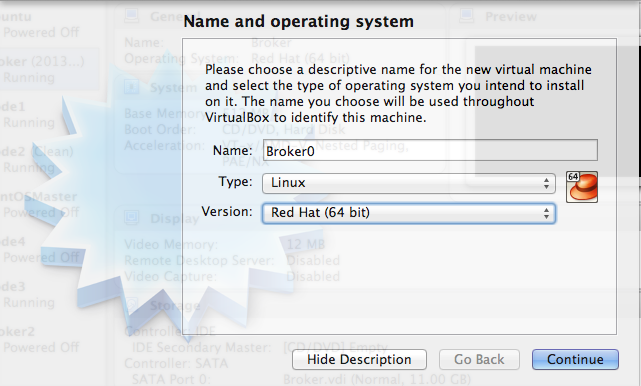
ตั้งชื่อและเลือกชนิดของ Guest OS
รูปที่ 4 ตั้งชื่อ และ เลือกชนิดของ Guest OS
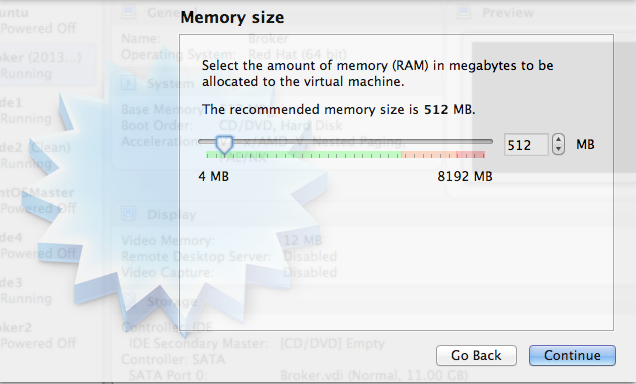
กำหนดขนาด RAM
รูปที่ 5 กำหนดขนาดของหน่วยความจำ (RAM)
ขนาดของหน่วยความจำ (RAM) เลือกให้เหมาะสมกับที่มีอยู่นะครับ ผมใช้แค่ 512 MB ก็ยังพอไหวอยู่เพราะไม่ได้ใช้งานจริง
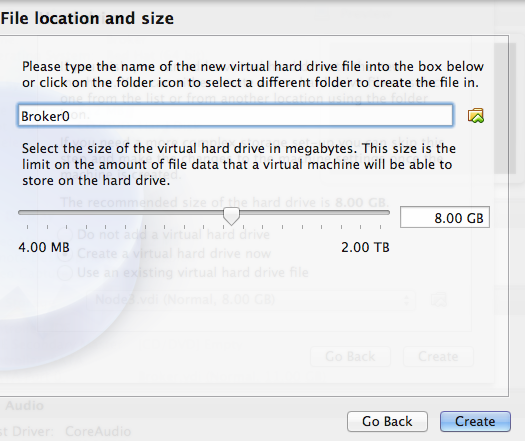
Disk Size
รูปที่ 6 สร้าง Disk Image
สร้างดิสก์เก็บข้อมูลจำลอง (Hard drive) เลือก Create a virtual hard drive now หลังจากนั้นก็เลือกแบบ VDI (VirtualBox Disk Image) ถัดไปเลือกแบบ Dynamically allocated และ กำหนดขนาดของ Disk 8GB ก็น่าจะพอครับถ้าแค่ทดสอบเฉย ๆ หลังจากนั้นก็ให้ทำการสร้างได้เลย

ใส่ แผ่นติดตั้ง
รูปที่ 7 กำหนดค่า CD-ROM
เมื่อสร้าง Guest OS ไว้แล้วก็ให้กำหนดค่า CD-ROM ของ VM ให้ใช้ ISO ที่ Download มา โดยเลือกที่ชื่อ Guest OS ที่สร้างไว้แล้วกด icon Setting ด้านบนแล้วเลือก Storage และเลือกที่รูป CD ที่เขียนว่า Empty ติ๊กที่ Live CD/DVD แล้วเลือก ISO ที่โหลดมา โดยเลือกที่รูป CD ด้านขวาถ้าไม่เคยเลือกมาก่อนก็ให้ Browse ไปยังที่เก็บ ISO แต่ถ้าเคยใช้มาก่อนมันจะขึ้นมาให้เลือก
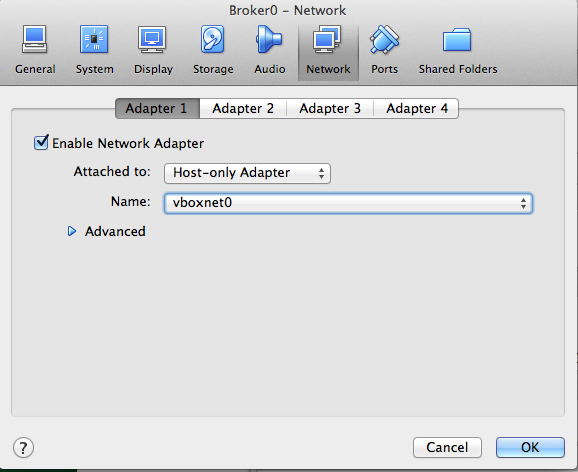
กำหนด Network Card ใบแรก eth0
รูปที่ 8.1 ตั้งค่า Network Card ใบที่ 1
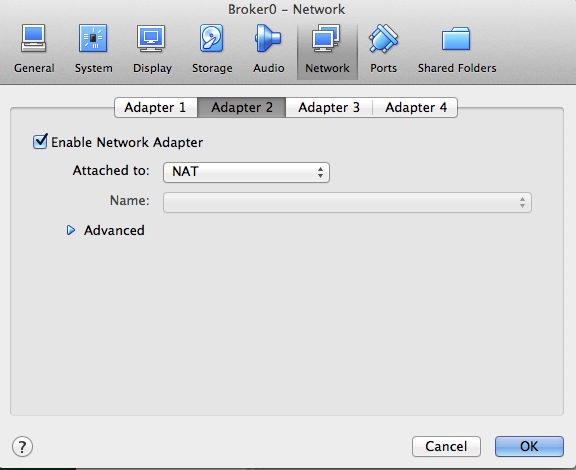
กำหนด Network Card ใบที่สอง eth1
รูปที่ 8.2 ตั้งค่า Network Card ใบที่ 2
หลังจากนั้นให้เลือกตรง Network เพื่อทำการตั้งค่าว่าใน Guest OS จะมี Network Card กี่ใบและเป็นแบบไหนของผมจะใช้ สองใบ คือ
- Adapter 1 เป็นแบบ Host-only Adapter และเลือก vboxnet ที่สร้างไว้ตอนแรกของผมเป็น vboxnet0 interface นี้จะใช้สำหรับการสื่อสารกันภายใน ระหว่าง Guest OS กับ Host OS และ Guest OS ที่ใช้ vboxnet เดียวกัน ใน CentOS จะเห็นเป็น eth0
- Adapter 2 เป็นแบบ NAT ใช้สำหรับออก internet ใน CentOS จะเห็นเป็น eth1
ติดตั้ง CentOS 6.5
เสร็จการปรับค่าก็ให้ทำการ Boot Guest OS เพื่อทำการติดตั้งได้เลย ซึ่งขั้นตอนติดตั้ง CentOS 6 minimal ไม่ยุ่งยากและไม่นานทำตามขั้นตอนข้างล่างได้เลยครับ ซึ่งเมื่อติดตั้งเสร็จเรียบร้อยแล้วให้ท่านทำการปลด ISO ออกจาก CD-ROM ด้วยนะครับอาจจะ click ที่รูป CD ด้านล่างของหน้าต่าง Guest OS ก็ได้เพราะบางทีเวลา Boot เข้ามาอาจจะเข้าตัวติดตั้งได้
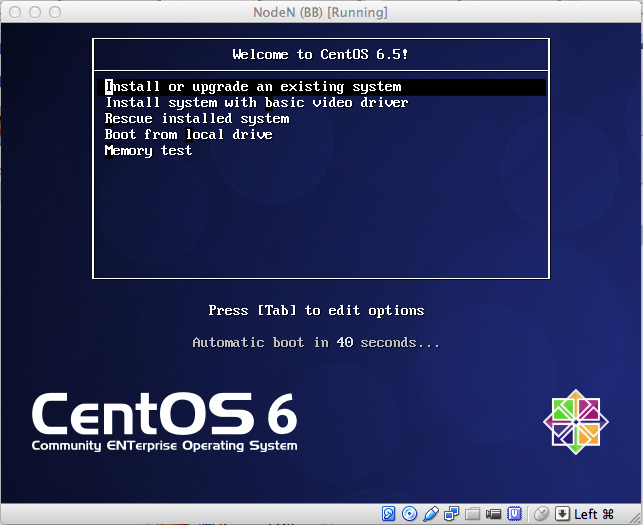
CentOS 6.5 Boot Menu
รูปที่ 9 เมนูแผ่นติดตั้ง CentOS 6.5 (Final)
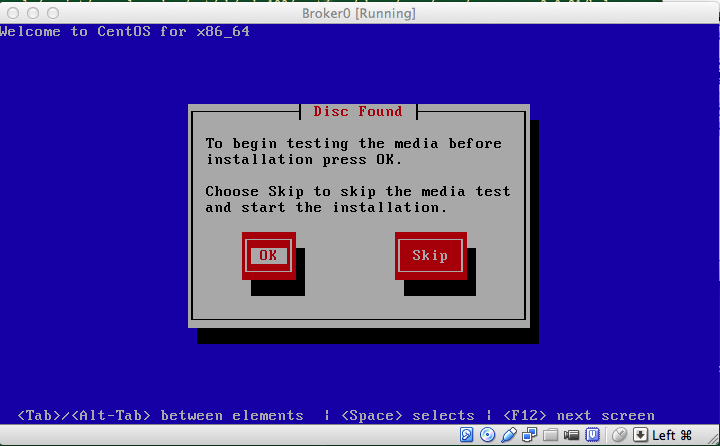
ตรวจสอบแผ่นติดตั้ง
รูปที่ 10 ตรวจสอบแผ่นติดตั้ง ให้ skip ไปนะครับเสียเวลาเพราะใช้เวลานาน
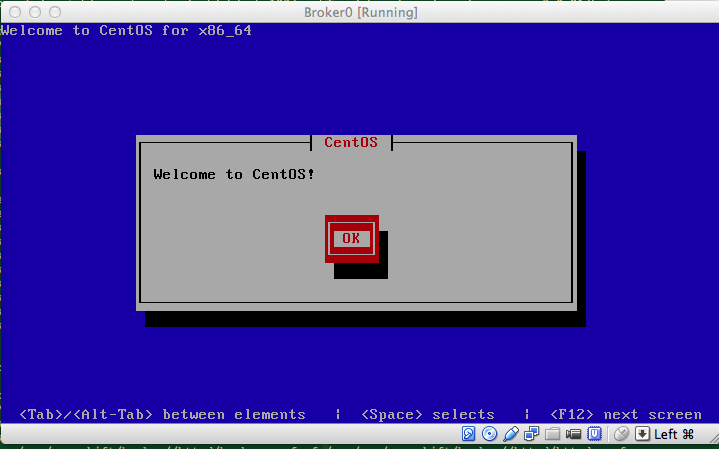
หน้าต้อนรับของตัวติดตั้ง CentOS
รูปที่ 11 หน้าต้อนรับของตัวติดตั้ง CentOS
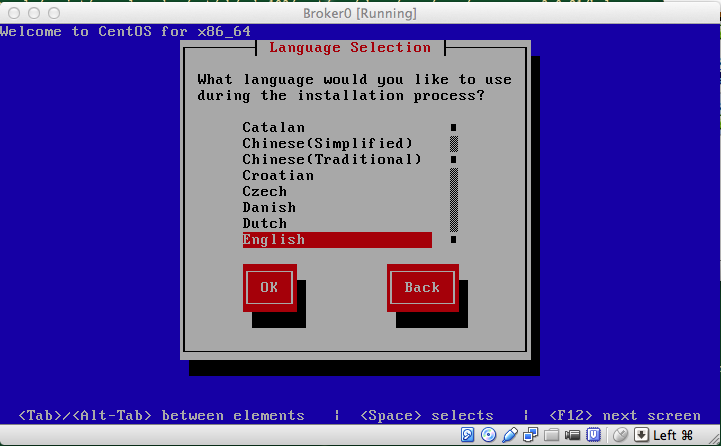
เลือกภาษา
รูปที่ 12 เลือกภาษาที่จะติดตั้ง ปกติก็ English

เลือก keyboard server ใช้ us ก็พอ
รูปที่ 13 เลือก keyboard ใช้ us ก็พอครับ
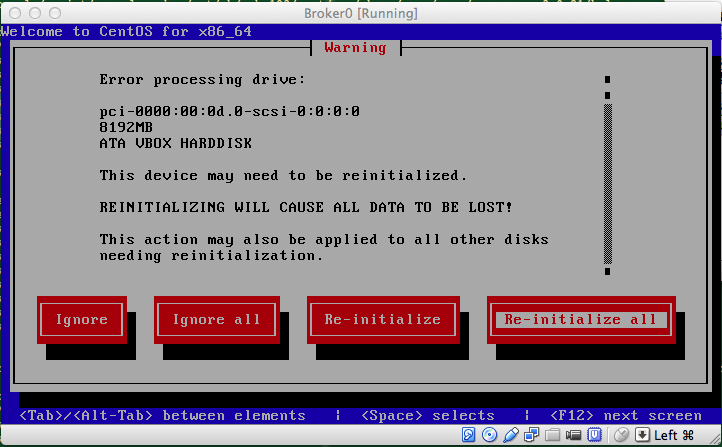
เริ่มต้นใช้ Disk
รูปที่ 14 เนื่องจาก Disk จำลองเพิ่งสร้างยังไม่เคยใช้มาก่อน อารมณ์ประมาณซื้อ Harddisk มาใหม่สด ๆ ซิง ๆ ต้องเริ่มใหม่ทั้งหมด
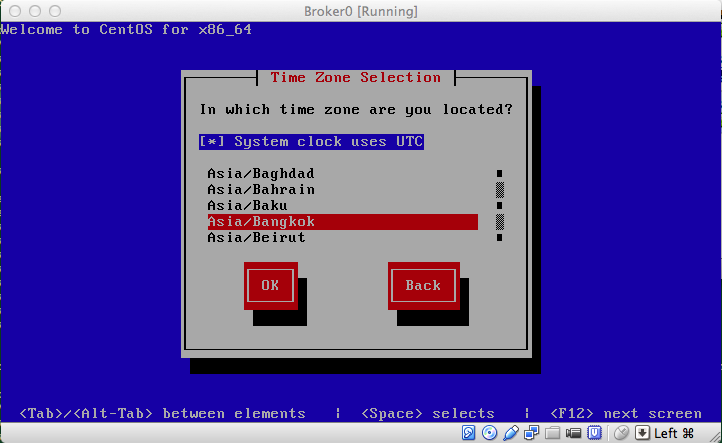
ตั้งค่าเขตเวลา
รูปที่ 15 เลือกเขตเวลาให้เหมาะสมจะได้ไม่ต้องมานั่งคำนวณว่าเวลากี่โมงกี่ยาม
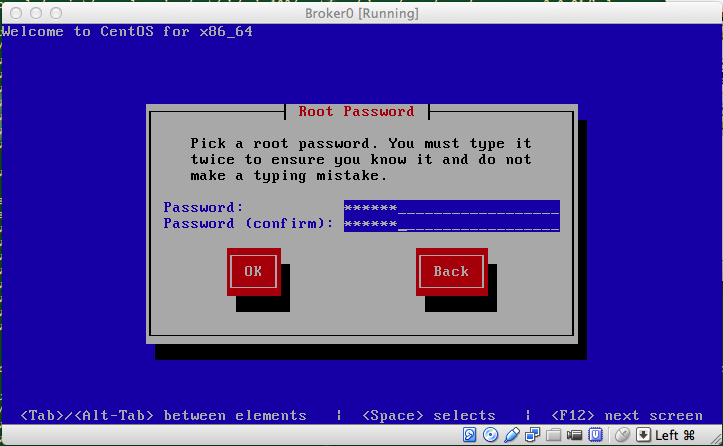
ตั้งรหัสผ่าน
รูปที่ 16 ตั้งรหัสผ่าน root ตั้งให้จำได้นะครับ
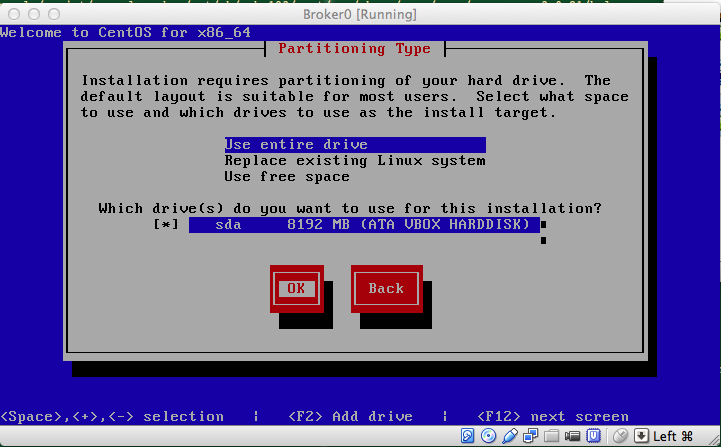
จัดการ Partition
รูปที่ 17 เนื่องจากเป็นระบบทดสอบตรงนี้ก็เลือกแบบง่าย ๆ ใช้ทั้ง disk ตามรูป
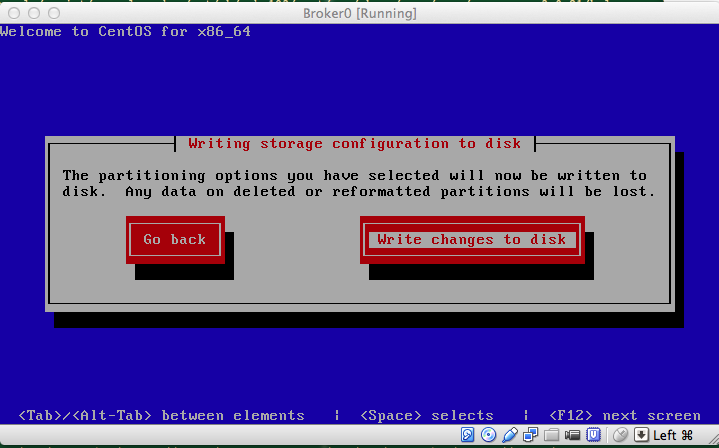
ยืนยันการแบ่ง Partition
รูปที่ 18 ยืนยันว่าจะแบ่ง Partition ตามนั้น
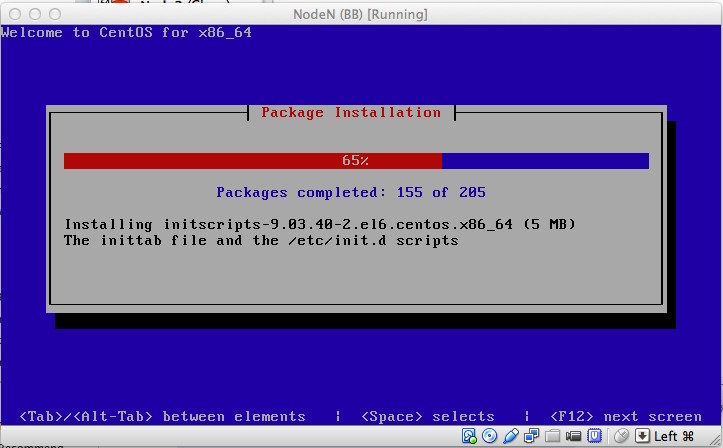
ระหว่างการติดตั้ง
รูปที่ 19 ระหว่างการติดตั้งไม่นานมาก สองสามนาที
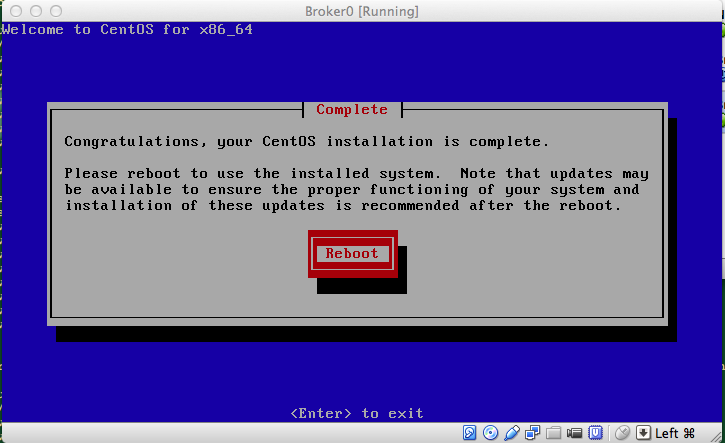
Reboot!!
รูปที่ 20 เสร็จสิ้นการติดตั้ง reboot !
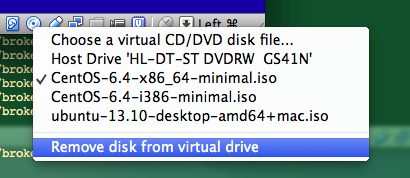
eject CD-ROM
รูปที่ 21 เอาแผ่น CD ออก
ปรับแต่งเบื้องต้น
เมื่อติดตั้ง CentOS เสร็จเรียบร้อยและ reboot เข้ามาใช้งานครั้งแรก Ethernet interface ยังใช้ไม่ได้ต้องเข้าไปเปิดใช้งานก่อนโดยให้แก้ไข config ต่อไปนี้
vi /etc/sysconfig/network-scripts/ifcfg-eth0
DEVICE=eth0
HWADDR=08:00:27:07:97:91
TYPE=Ethernet
UUID=1afb7d3a-d86c-47e2-8045-6f6633d7ae79
ONBOOT=yes  ## แก้จาก no เป็น yes
NM_CONTROLLED=yes
BOOTPROTO=dhcp
vi /etc/sysconfig/network-scripts/ifcfg-eth1
DEVICE=eth1
HWADDR=08:00:27:33:7D:A2
TYPE=Ethernet
UUID=f11a0423-5b0b-4852-88af-ec440fbc8002
ONBOOT=yes ## แก้จาก no เป็น yes
NM_CONTROLLED=yes
BOOTPROTO=dhcp
ให้แก้เฉพาะตรง ONBOOT=no เป็น ONBOOT=yes
ส่วนค่าอื่น ๆ ปล่อยไว้แบบนั้นซึ่ง eth0 กับ eth1 จะไม่เหมือนกันระวังจะ copy ไปนะครับของท่านก็จะมีค่า MAC และ UUID ต่างกัน
เมื่อเสร็จให้ restart network service /etc/init.d/network restart ลอง ifconfig ดูว่าได้รับ IP ทั้งคู่หรือไม่ ifconfig eth0
eth0      Link encap:Ethernet  HWaddr 08:00:27:07:97:91
inet addr:192.168.5.1  Bcast:192.168.2.255  Mask:255.255.255.0
inet6 addr: fe80::a00:27ff:fe07:9791/64 Scope:Link
UP BROADCAST RUNNING MULTICAST  MTU:1500  Metric:1
RX packets:101 errors:0 dropped:0 overruns:0 frame:0
TX packets:87 errors:0 dropped:0 overruns:0 carrier:0
collisions:0 txqueuelen:1000
RX bytes:14370 (14.0 KiB)  TX bytes:10580 (10.3 KiB)
ifconfig eth1
eth1      Link encap:Ethernet  HWaddr 08:00:27:33:7D:A2
inet addr:10.0.3.15  Bcast:10.0.3.255  Mask:255.255.255.0
inet6 addr: fe80::a00:27ff:fe33:7da2/64 Scope:Link
UP BROADCAST RUNNING MULTICAST  MTU:1500  Metric:1
RX packets:44 errors:0 dropped:0 overruns:0 frame:0
TX packets:52 errors:0 dropped:0 overruns:0 carrier:0
collisions:0 txqueuelen:1000
RX bytes:4340 (4.2 KiB)  TX bytes:4572 (4.4 KiB)
หลังจากนี้ผมแนะนำให้ท่าน ssh เข้ามาใช้งานซึ่งจะทำงานได้สะดวกกว่า เพราะจะ copy และ paste คำสั่งได้ง่ายกว่าเยอะครับ
ติดตั้งเครื่องมือที่ถนัดและใช้บ่อย
ส่วนนี้ขึ้นอยู่กับแต่ละบุคคลนะครับว่าแต่ละคนถนัดหรือใช้คำสั่งไหนบ่อยของผมก็มีประมาณนี้
- vim ใช้ง่ายกว่า vi นิดหนึ่ง
- nano ผมติด pico แต่ไม่มีให้ใช้เลยใช้ nano แทน
- wget ถ้าใครใช้ curl ได้ก็ใช้ curl ไม่ต้องลงเพิ่ม
- mlocate เอาไว้ใช้คำสั่ง locate ไว้หา file ที่ไม่รู้ว่ามันอยู่ที่ไหน ติดตั้งเสร็จก็ให้ updatedb ก่อน หรือสั่งก่อนจะ locate
- lynx เอาไว้เข้าเว็บด้วย command line
yum -y install vim nano wget mlocate lynx
เตรียมระบบ
* BROKER Host ** * NODE Host** ขั้นตอนนี้ทำทั้งเครื่อง Broker และ Node โดยเริ่มจาก
ตั้งค่า Yum Repositories
OpenShift Origin จะมี repo ของตัวเองซึ่งเราสามารถนำมาใช้บน CentOS ได้เลย
OpenShift Origin
cat <<EOF> /etc/yum.repos.d/openshift-origin-deps.repo
[openshift-origin-deps]
name=openshift-origin-deps
baseurl=https://mirror.openshift.com/pub/openshift-origin/nightly/rhel-6/dependencies/x86_64/
gpgcheck=0
enabled=1
EOF
cat <<EOF> /etc/yum.repos.d/openshift-origin.repo
[openshift-origin]
name=openshift-origin
baseurl=https://mirror.openshift.com/pub/openshift-origin/nightly/rhel-6/latest/x86_64/
gpgcheck=0
enabled=1
EOF
yum repos นี้เป็นของ OpenShift Origin แบบ Nightly นะครับการใช้งานจะอยู่บนพื้นฐานของความมันส์ แต่เท่าที่ลองก็ใช้ได้ดีครับ
EPEL
หลังจากนั้นให้ติดตั้ง EPEL ซึ่ง CentOS จะทำงานแทน RHEL ได้โดยติดตั้ง yum install -y –nogpgcheck http://dl.fedoraproject.org/pub/epel/6/x86_64/epel-release-6-8.noarch.rpm
ส่วนรุ่นนั้นให้ตรวจสอบจาก http://fedoraproject.org/wiki/EPEL ว่ามีอัปเดทจากตัวอย่างไปหรือไม่
เมื่อติดตั้งเสร็จแล้วให้แก้ epel repo nano -w /etc/yum.repos.d/epel.repo
[epel]
name=Extra Packages for Enterprise Linux 6 - $basearch
#baseurl=http://download.fedoraproject.org/pub/epel/6/$basearch
mirrorlist=https://mirrors.fedoraproject.org/metalink?repo=epel-6&arch=$basearch
exclude=*passenger* nodejs*
failovermethod=priority
enabled=1
gpgcheck=1
gpgkey=file:///etc/pki/rpm-gpg/RPM-GPG-KEY-EPEL-6
โดยใส่ _exclude=*passenger* nodejs_* เพิ่มลงไปเพราะเราจะใช้ของ OpenShift Origin แก้เฉพาะ [epel] ก็พอให้สังเกตว่าส่วนอื่นจะไม่ได้ใช้งาน enable=0
Update ระบบ
เมื่อทำทั้งหมดเรียบร้อยให้ update ระบบหนึ่งรอบ
yum clean all
yum -y update
ตั้งค่าเวลา NTP
* BROKER Host ** * NODE Host**
อันนี้จำเป็นอย่างมากเพราะถ้าเวลาไม่ตรงกันระหว่าง broker และ node มันจะคุยกันไม่รู้เรื่องครับเจอมากับตัวหากันนานมาก
yum -y install ntpdate ntp สั่ง update เวลาปัจจุบันให้ตรงกับเวลามาตรฐาน ntpdate clock.nectec.or.th ตั้งค่า service ให้ทำงานทุกครั้งที่ boot เครื่อง
chkconfig ntpd on
service ntpd start
หมายเหตุ: จากการสังเกตการทำงานบน VM ถ้าเปิดไว้นาน ๆ เครื่อง Host OS มีการ sleep บ้างพักบ้าง หรือระบบที่เพิ่ง restore VM snapshot มา อาจจะทำให้เวลาเพี้ยนได้เหมือนกันถ้ามีปัญหาและสงสัยว่าเวลาเพี้ยนก็ให้ restart service ก็ได้ครับ
ตั้งค่าสภาพแวดล้อมให้ Ruby
ระบบหลักของ OpenShift จะใช้ ruby ดังนั้นจำเป็นต้องติดตั้งในลำดับแรก ให้ทำตามลำดับดังนี้ yum -y install ruby193
cat <<'EOF' > /etc/profile.d/scl193.sh
# Setup PATH, LD_LIBRARY_PATH and MANPATH for ruby-1.9
ruby19_dir=$(dirname `scl enable ruby193 "which ruby"`)
export PATH=$ruby19_dir:$PATH

ruby19_ld_libs=$(scl enable ruby193 "printenv LD_LIBRARY_PATH")
export LD_LIBRARY_PATH=$ruby19_ld_libs:$LD_LIBRARY_PATH

ruby19_manpath=$(scl enable ruby193 "printenv MANPATH")
export MANPATH=$ruby19_manpath:$MANPATH
EOF
cp -f /etc/profile.d/scl193.sh /etc/sysconfig/mcollective
chmod 0644 /etc/profile.d/scl193.sh /etc/sysconfig/mcollective
ค่าเหล่านี้จะมีผลเมื่อ login ครั้งต่อไป (ไม่ต้อง reboot) ดังนั้นให้ logout แล้ว ssh เข้ามาใหม่อีกครั้ง
Clone Guest OS
มาถึงตอนนี้จะเป็นจุดแยกระหว่าง broker และ node ซึ่งท่านสามารถทำการ clone Guest OS ออกเป็นสองตัวเพื่อทำเป็น broker และ node หรือจะ clone เก็บไว้เป็น backup แต่บางท่านจะใช้วิธีทำ snapshot เก็บไว้เวลามีปัญหาก็สามารถ restore กับไปจุดที่เก็บไว้ได้
ก่อนทำการ Clone ให้ shutdown ระบบเสียก่อนโดยใช้คำสั่ง halt
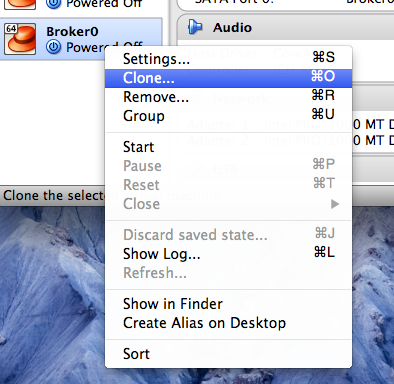
Clone VM
รูปที่22 การ Clone VM
หลังจากนั้นให้ Click ขวาบนชื่อของ Guest OS แล้วเลือก Clone ตามรูปที่ 22
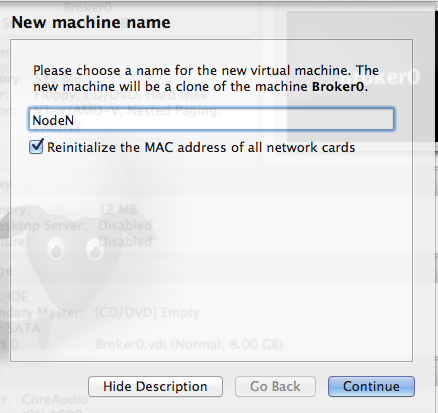
ตั้งชื่อ VM ใหม่
รูปที่23 ตั้งชื่อ Guest OS ใหม่
ให้เลือก Reinitialize the MAC address of all network cards ด้วยนะครับ
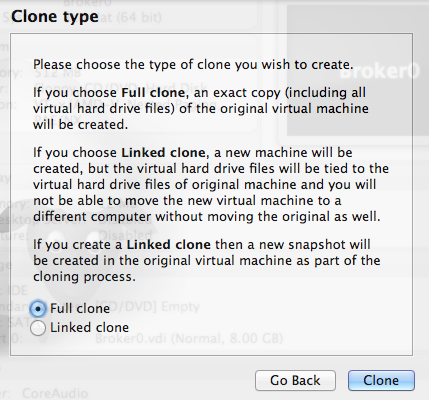
Clone Type
รูปที่24 ชนิดของการ Clone
เลือกแบบ full ไปเลยครับ เสร็จแล้วก็จะเริ่มทำการ Clone
ปรับแต่งที่ Clone มา
เมื่อเรา clone เรียบร้อยแล้วให้ boot เข้า Guest OS ตัวใหม่ที่ clone เพิ่งเสร็จเมื่อสักครู่ เข้าไปครั้งแรกจะพบว่าระบบ network จะใช้ไม่ได้ ifconfig จะเห็นแค่ lo อันเดียว ถ้าอยากเห็นทั้งหมดให้ลองสั่ง
ifconfig -a
eth2      Link encap:Ethernet  HWaddr 08:00:27:7F:2A:3A
BROADCAST MULTICAST  MTU:1500  Metric:1
RX packets:0 errors:0 dropped:0 overruns:0 frame:0
TX packets:0 errors:0 dropped:0 overruns:0 carrier:0
collisions:0 txqueuelen:1000
RX bytes:0 (0.0 b)  TX bytes:0 (0.0 b)

eth3      Link encap:Ethernet  HWaddr 08:00:27:37:80:88
BROADCAST MULTICAST  MTU:1500  Metric:1
RX packets:0 errors:0 dropped:0 overruns:0 frame:0
TX packets:0 errors:0 dropped:0 overruns:0 carrier:0
collisions:0 txqueuelen:1000
RX bytes:0 (0.0 b)  TX bytes:0 (0.0 b)

lo        Link encap:Local Loopback
inet addr:127.0.0.1  Mask:255.0.0.0
inet6 addr: ::1/128 Scope:Host
UP LOOPBACK RUNNING  MTU:16436  Metric:1
RX packets:0 errors:0 dropped:0 overruns:0 frame:0
TX packets:0 errors:0 dropped:0 overruns:0 carrier:0
collisions:0 txqueuelen:0
RX bytes:0 (0.0 b)  TX bytes:0 (0.0 b)
จะสังเกตุเห็นว่าเลขของ eth จะมี eth2 และ eth3 แทนที่จะเป็น eth0 กับ eth1 เป็นเพราะว่าระบบมันจำค่าเก่าไว้ เลยนับต่อจากของเก่า ตรงนี้ให้แก้ไขค่าสองที่คือ
แก้ไขค่า udev โดยใช้คำสั่ง
nano -w /etc/udev/rules.d/70-persistent-net.rules โดยให้ลบบรรทัดที่เป็นค่าต่าง ๆ ของ eth0 – eth3 ทั้งหมดเลยแล้วทำการ save ออกมา
แก้ไขค่าใน file ifcfg-ethX
nano -w /etc/sysconfig/network-scripts/ifcfg-eth0
nano -w /etc/sysconfig/network-scripts/ifcfg-eth1
โดยให้ comment บรรทัด HWADDR และ UUID ออก หรือ จะแก้ไขค่าให้ตรงกับค่าปัจจุบันก็ได้แต่ก็ไม่จำเป็นลบออกง่ายกว่า
เมื่อแก้เสร็จทั้งสอง file ให้ reboot Guest OS หนึ่งรอบ กลับเข้ามา network ก็จะทำงานถูกต้องโดยมี eth0 และ eth1 ตามปกติ และ จะได้รับ IP ปกติ
reboot
ตั้งค่าเครื่อง Broker Host
ระหว่างการรอ download packages ติดตั้งทางฝั่ง Broker สามารถที่จะ boot Node ขึ้นมาติดตั้งไปด้วยก็ได้นะครับ ขั้นต่อไปเรามาติดตั้งระบบต่าง ๆ ที่จำเป็นบนเครื่อง Broker กันครับเครื่อง Broker ก็มีหน้าที่เหมือนชื่อมันนั่นแหละคือประมาณเป็นตัวกลางคอยรับงานมาแล้วกระจายไปยัง Node อีกที อยากรู้มากกว่านี้ไปหาอ่านเอาครับผมก็ยังไม่อ่านเหมือนกัน ฮา ๆ
ตั้งค่า DNS Server
* BROKER Host
มา setup DNS server กันก่อนเพราะการติดต่อสื่อสารกันต้องใช้ชื่อแทน IP จะได้ง่าย ๆ และจำเป็นสำหรับการทำ vHost ให้กับ Gear ต่าง ๆ ด้วย มาลุยกันเลย
BIND
Bind จะทำหน้าที่เป็น DNS Server ซึ่งขั้นตอนการติดตั้งและตั้งค่ามีดังนี้ ติดตั้ง bind โดยใช้คำสั่ง yum -y install bind bind-utils
ตั้งค่าระบบ และ DNSSEC key file
set ค่าตัวแปรชั่วคราว domain กับ keyfile เพื่อความสะดวกในการเรียก จะได้ไม่เกิดปัญหาเรื่องพิมพ์ชื่อผิด
domain=example.com
keyfile=/var/named/${domain}.key
myip=$(ifconfig eth0 | sed -En 's/.*inet (addr:)?(([0-9]*\.){3}[0-9]*).*/\2/p')
สร้าง DNSSEC key ใหม่
cd /var/named
rm -f K${domain}*
dnssec-keygen -a HMAC-MD5 -b 512 -n USER -r /dev/urandom ${domain}
KEY="$(grep Key: K${domain}*.private | cut -d ' ' -f 2)"
echo $KEY
เมื่อสั่งคำสั่งด้านบนเสร็จแล้วให้ตรวจสอบว่าค่า KEY ที่ได้ว่างเปล่าหรือมีค่า ถ้าว่างเปล่าแสดงว่าขั้นตอนสร้าง key อาจจะไม่ถูกต้องให้ไล่ใหม่
สร้าง rndc key สำหรับ BIND
rndc-confgen -a -r /dev/urandom
set ค่า SELinux และ สิทธิ์การใช้งานให้กับ key file ที่สร้างขึ้นมา
restorecon -v /etc/rndc.* /etc/named.*
chown -v root:named /etc/rndc.key
chmod -v 640 /etc/rndc.key
สร้าง fowarders.conf file
ตรงนี้นิยมใช้ 8.8.8.8 ของ google เพราะเรียกได้เกือบทุกที่ แต่ถ้ามีปัญหาก็อาจจะใช้ DNS Server ของคุณที่ใช้ออกภายนอกแทนได้
echo "forwarders { 8.8.8.8; 8.8.4.4; } ;" >> /var/named/forwarders.conf
restorecon -v /var/named/forwarders.conf
chmod -v 640 /var/named/forwarders.conf
ค่าใน forwarders.conf จะใช้ในกรณีที่ค้นหาภายในระบบของเราไม่เจอก็จะไปถามที่เราตั้งไว้แทน ซึ่งระหว่างที่ผมทดสอบระบบ ผมก็ใช้ DNS Servcer ของ Broker อย่างเดียวบน OS X เพราะเครื่องผมจะได้รู้จักชื่อในระบบที่เรากำลังทำอยู่ด้วย และ ยังสามารถออกเน็ทข้างนอกผ่าน forwarders ได้อีกด้วย (เข้าใจปะ)
สร้าง subdomain และ DNS Database
cat <<EOF > /var/named/dynamic/${domain}.db
\$ORIGIN .
\$TTL 1 ; 1 seconds (for testing only)
${domain}       IN SOA  ns1.${domain}. hostmaster.${domain}. (
2011112904 ; serial
60         ; refresh (1 minute)
15         ; retry (15 seconds)
1800       ; expire (30 minutes)
10         ; minimum (10 seconds)
)
A   ${myip}
NS  ns1.${domain}.
MX  10 mail.${domain}.
\$ORIGIN ${domain}.
broker     A   ${myip}
ns1        A   ${myip}
ns1        A   127.0.0.1
EOF
ลองตรวจสอบว่าข้อมูลครบถ้วนหรือไม่โดยใช้คำสั่ง cat /var/named/dynamic/${domain}.db ของผมจะได้ผลลัพธ์แบบนี้
$ORIGIN .
$TTL 1 ; 1 seconds (for testing only)
example.com       IN SOA  ns1.example.com. hostmaster.example.com. (
2011112904 ; serial
60         ; refresh (1 minute)
15         ; retry (15 seconds)
1800       ; expire (30 minutes)
10         ; minimum (10 seconds)
)
A   192.168.5.1
NS  ns1.example.com.
MX  10 mail.example.com.
$ORIGIN example.com.
broker    A   192.168.5.1
ns1    A   192.168.5.1
ns1    A   127.0.0.1
ผมใส่ A ${myip} ไปด้วยเพื่อให้ example.com มี IP ด้วยเพื่อความเท่นะครับ ส่วนบรรทัด broker A ${myip} ก็เพื่อให้ node และ เครื่อง HOST OS ของ VirtualBox รู้จักด้วย เช่นเดียวกับ ns1 A ${myip}
สร้าง key file ให้กับ DNSSEC
cat <<EOF > /var/named/${domain}.key
key ${domain} {
algorithm HMAC-MD5;
secret "${KEY}";
};
EOF
สร้าง named configuration file
cat <<EOF > /etc/named.conf
// named.conf
//
// Provided by Red Hat bind package to configure the ISC BIND named(8) DNS
// server as a caching only nameserver (as a localhost DNS resolver only).
//
// See /usr/share/doc/bind*/sample/ for example named configuration files.
//

options {
listen-on port 53 { any; };
directory   "/var/named";
dump-file   "/var/named/data/cache_dump.db";
statistics-file "/var/named/data/named_stats.txt";
memstatistics-file "/var/named/data/named_mem_stats.txt";
allow-query     { any; };
recursion yes;

/* Path to ISC DLV key */
bindkeys-file "/etc/named.iscdlv.key";

// set forwarding to the next nearest server (from DHCP response
forward only;
include "forwarders.conf";
};

logging {
channel default_debug {
file "data/named.run";
severity dynamic;
};
};

// use the default rndc key
include "/etc/rndc.key";

controls {
inet 127.0.0.1 port 953
allow { 127.0.0.1; } keys { "rndc-key"; };
};

include "/etc/named.rfc1912.zones";

include "${domain}.key";

zone "${domain}" IN {
type master;
file "dynamic/${domain}.db";
allow-update { key ${domain} ; } ;
};
EOF
ตั้งสิทธิ์และ SELinux
chown -Rv named:named /var/named
restorecon -rv /var/named
chown -v root:named /etc/named.conf
restorecon /etc/named.conf
ตั้งค่าเครื่อง Broker ให้ใช้ DNS Server ใหม่
ให้แก้ไข file /etc/resolv.conf
cat <<EOF >/etc/resolv.conf
domain example.com
search example.com
nameserver 127.0.0.1
EOF
ใส่ค่า search example.com ไว้ด้วยเวลาเราเรียก จะได้เรียกแค่ชื่อ host เช่นเวลา ping ก็เรียกแค่
ping node
ping broker
เปิด firewall และ เปิด service
lokkit --service=dns
chkconfig named on
เริ่มใช้งาน DNS Server โดยใช้คำสั่ง ด้านล่าง boot ครั้งต่อไปไม่ต้องสั่งนะครับเพราะเราเปิด service ไว้แล้ว
service named start ลอง ping broker ping broker
PING broker.example.com (192.168.5.1) 56(84) bytes of data.
64 bytes from 192.168.5.1: icmp_seq=1 ttl=64 time=0.018 ms
หรือใช้คำสั่ง dig
dig example.com
dig broker.example.com
ปรับแก้ ifcfgX
ให้เพิ่มค่าใน
/etc/sysconfig/network-scripts/ifcfg-eth0
/etc/sysconfig/network-scripts/ifcfg-eth1
myip=$(ifconfig eth0 | sed -En 's/.*inet (addr:)?(([0-9]*\.){3}[0-9]*).*/\2/p')

cat <<EOF>>/etc/sysconfig/network-scripts/ifcfg-eth0
PEERDNS=no
DNS1=${myip}
EOF

cat <<EOF>>/etc/sysconfig/network-scripts/ifcfg-eth1
PEERDNS=no
DNS1=${myip}
EOF- ค่า PEERDNS=”no” คือไม่ต้องรับค่า DNS จาก DHCP Server
- ค่า DNS1 คือ IP ของ Broker ของท่านนะครับ
ตั้งค่า hostname
ตอนนี้เครื่องเรายังชื่อ localhost อยู่ สังเกตที่ prompt นะครับ เราต้องแก้ชื่อเครื่องสองที่ด้วยกันคือ nano -w /etc/sysconfig/network แก้จาก HOSTNAME=localhost.localdomain เป็น HOSTNAME=broker.example.com และสั่งด้วยคำสั่ง hostname broker.example.com แต่ prompt ยังไม่เปลี่ยนนะครับถ้าเข้ามาใหม่ก็จะเป็นชื่อใหม่ละ ตอนนี้ลองสั่ง hostname จะได้ชื่อที่เราตั้งไว้ ในทำนองเดียวกันกับเครื่อง node เราก็ต้องตั้งค่า hostname ให้ทุกเครื่องนะครับ เพิ่มบรรทัดนี้ลงใน /etc/hosts
cat<<EOF>>/etc/hosts
192.168.5.1 broker.example.com
127.0.0.1 broker.example.com
EOF
ติดตั้ง MongoDB
* Broker Host
OpenShift Origin จะเก็บค่าต่าง ๆ ไว้ใน MongoDB ทั้งหมด ซึ่งการติดตั้งตรงนี้เป็นการใช้งานสำหรับ OpenShift Origin นะครับ
ติดตั้ง Server
yum -y install mongodb-server mongodb libmongodb
ตั้งค่า MongoDB
nano -w /etc/mongodb.conf ให้ใส่ค่า smallfiles=true ตรงนี้เวลาสร้าง db ใหม่จะได้ไม่จองไว้เยอะ บันทึกเสร็จให้ start service service mongod start
สร้าง OpenShift broker user
mongo localhost/openshift_broker_dev --eval 'db.addUser("openshift", "openshift")'
mongo localhost/admin --eval 'db.addUser("openshift", "openshift")'
ข้างบนสามารถเปลี่ยน username และ password ตามใจเราได้นะครับใช้สำหรับจัดการ db
หลังจากนั้นให้ปิด service อีกครั้งเพราะตั้งค่าใหม่ service mongod stop แก้ไขอีกครั้ง nano -w /etc/mongodb.conf ให้เอา comment บรรทัดข้างล่างออก
auth=true
เมื่อกี้เรายังไม่ต้องการ auth หลังจากนี้เมื่อ start อีกครั้ง MongoDB จะให้ใส่ user และ password ก่อนถึงจะใช้ db ได้
ตั้งค่า firewall
แก้ไขอีกครั้ง nano -w /etc/mongodb.conf โดยการเพิ่ม IP ของเครื่องเราต่อได้บรรทัด ด้านล่างโดยใช้ comma คั่น
bind_ip=127.0.0.1
แก้เป็น
bind_ip=127.0.0.1,192.168.5.1
เปิด firewall lokkit –port=27017:tcp เปิด service ทุกครั้งตอน boot chkconfig mongod on start service อีกครั้ง service mongod start ทดสอบ user password ของ db โดยใช้คำสั่ง mongo admin แล้วพิมพ์บรรทัดด้านล่างลงไป ถ้าถูกต้องจะคืนค่า 1 กลับมาทดสอบเสร็จแล้วก็พิมพ์ exit ออกมา db.auth(‘openshift’,”openshift”)
ติดตั้ง ActiveMQ
* BROKER Host
ActiveMQ เป็น Messenger Service ที่ทำหน้าที่เป็นตัวกลางในการติดต่อสื่อสารระหว่าง broker กับ node เป็น Java ติดตั้งด้วยคำสั่ง
ติดตั้ง
yum -y install activemq activemq-client เมื่อติดตั้งเสร็จให้ download config และตั้งค่าต่างดังนี้
cd /etc/activemq
mv activemq.xml activemq.orig
curl -o /etc/activemq/activemq.xml http://openshift.github.io/documentation/files/activemq.xml
curl -o /etc/activemq/jetty.xml http://openshift.github.io/documentation/files/jetty.xml
curl -o /etc/activemq/jetty-realm.properties http://openshift.github.io/documentation/files/jetty-realm.properties
แก้ activemq.xml
nano -w /etc/activemq/activemq.xml แก้ไขชื่อ host เป็น broker.example.com จะได้เป็น
<broker xmlns="http://activemq.apache.org/schema/core" brokerName="broker.example.com" dataDirectory="${activemq.data}">และตั้งค่า user password ใน file activemq.xml ตาม block ด้านล่าง
<simpleAuthenticationPlugin>
<users>
<authenticationUser username="mcollective" password="secret" groups="mcollective,everyone"/>
<authenticationUser username="system" password="manager" groups="mcollective,admin,everyone"/>
</users>
</simpleAuthenticationPlugin>
ตัวอย่างที่ผมตั้งคือ
- user ทั่วไปเป็น mcollective และ pass: secret user นี้เอาไว้ติดต่อสื่อสารกันระหว่าง Client กับ Server ซึ่งตั้งให้ตรงกัน
- admin เป็น system และ pass: manager user เป็นค่า default ของ ActiveMQ แนะนำให้ใช้แบบนี้ เมื่อเข้าใจมันแล้วค่อยเปลี่ยนครับ
แก้ไข admin password ใน /etc/activemq/jetty-realm.properties nano -w /etc/activemq/jetty-realm.properties แล้วตั้งค่าไว้สำหรับ login หน้า ActiveMQ Console
admin: secret , admin
เปิด firewall
lokkit --port=61613:tcp
lokkit --port=8161:tcp
เปิด service
chkconfig activemq on

service activemq start
ทดสอบ ActiveMQ
โดยเรียก http://localhost:8161 ถ้าลง lynx ไว้ก็เรียกได้เลย lynx http://localhost:8161 ถ้าใครไม่ถนัดก็สามารถมาเรียกทางฝั่ง Host OS ก็ได้โดยทำ SSH Tunnel พิมพ์คำสั่งบน terminal ใช้ได้ทั้ง linux และ OS X ssh -f -N -L 8161:localhost:8161 [email protected] login ได้แล้วก็สามารถเปิดบน web browser ได้เลย ซึ่งใช้ user และ password ที่ตั้งไว้ใน /etc/activemq/jetty-realm.properties หมายเหตุ: ถ้าบังเอิญใครไล่ดู log แล้วไปเจอ libwrapper.so และรู้สึกขัดหูขัดตาก็ให้ copy ตามนี้ cp /usr/lib/activemq/linux/libwrapper.so /usr/share/activemq/bin/linux-x86-64/
ติดตั้ง MCollective client
* BROKER Host
MCollective ใช้สำหรับสื่อสารระหว่าง Broker กับ Gear Node โดย Client จะอยู่ทางฝั่ง Broker และ Server จะอยู่บน Gear Node แรก ๆ ก็จะงงว่ามันต่างกับ ActiveMQ ยังไง คร่าว ๆ คือ ActiveMQ เป็น Messenger Server ส่วน MCollecive จะเป็น Client คอยรับ Messege จาก ActiveMQ เช่นถ้าสั่งสร้าง Gear ขึ้นมา MCollective จะได้รับ Message “create gear” จาก ActiveMQ แล้วดำเนินการสร้าง Gear ขึ้นมาทางฝั่ง Gear Node
ติดตั้ง
yum -y install mcollective-client และตั้งค่าใน /etc/mcollective/client.cfg
cat <<EOF > /etc/mcollective/client.cfg
topicprefix = /topic/
main_collective = mcollective
collectives = mcollective
libdir =/opt/rh/ruby193/root/usr/libexec/mcollective
logfile = /var/log/mcollective-client.log
loglevel = debug

# Plugins
securityprovider = psk
plugin.psk = unset

connector = stomp
plugin.stomp.pool.size = 1
plugin.stomp.pool.1.host = broker.example.com
plugin.stomp.pool.1.port = 61613
plugin.stomp.pool.1.user = mcollective
plugin.stomp.pool.1.password = secret
EOF
หลังจากนั้นก็ให้ตั้งค่า user และ password ให้ตรงกับที่ตั้งไว้ หลังจาก ติดตั้ง MCollective Server ทางฝั่ง Node Host ค่อยทดสอบกันว่าใช้ได้หรือไม่
ติดตั้ง Broker
* BROKER Host ขั้นตอนนี้เป็นติดตั้งตัว OpenShift Origin Platform web broker/console ติดตั้งโดยใช้คำสั่ง
ติดตั้ง
yum  -y install  openshift-origin-broker openshift-origin-broker-util \
rubygem-openshift-origin-auth-remote-user \
rubygem-openshift-origin-auth-mongo \
rubygem-openshift-origin-msg-broker-mcollective \
rubygem-openshift-origin-dns-nsupdate \
rubygem-openshift-origin-dns-route53 \
ruby193-rubygem-passenger ruby193-mod_passenger
เปิด firewall ให้กับ services
เพิ่มความชัวร์ว่า service สองตัวต้องเปิดแน่ ๆ ซึ่งปกติมันก็เปิดอยู่แล้ว
chkconfig network on
chkconfig sshd on
lokkit --service=ssh
lokkit --service=https
lokkit --service=http
สร้างคีย์
gen access key ให้กับตัว OpenShift Server
openssl genrsa -out /etc/openshift/server_priv.pem 2048
openssl rsa -in /etc/openshift/server_priv.pem -pubout > /etc/openshift/server_pub.pem
gen ssh keypair ไว้สำหรับเครื่อง Broker ติดต่อกับ Node เช่นรับส่งข้อมูลในขั้นตอนการสร้าง Gear โดยไม่ต้องใช้รหัสผ่านนั่นเอง วิธีสร้างทำดังนี้
ssh-keygen -t rsa -b 2048 -f ~/.ssh/rsync_id_rsa
ระหว่างดำเนินการจะมีการถาม passphrase สองครั้งให้กด enter ผ่านไปนะครับเพราะถ้าเราตั้ง passphrase มันจะถาม passphrase ทุกครั้งที่ใช้งาน
copy key ที่สร้างไปเก็บไว้ใน openshift cp ~/.ssh/rsync_id_rsa* /etc/openshift/
ตั้งสิทธิ SELinux
setsebool -P  httpd_unified=on \
              httpd_can_network_connect=on \
              httpd_can_network_relay=on \
              httpd_run_stickshift=on \
              named_write_master_zones=on \
              allow_ypbind=on \
              httpd_verify_dns=on \
              httpd_enable_homedirs=on \
              httpd_execmem=on \
              httpd_read_user_content=on
ถ้าอยากรู้ว่าแต่ละค่าหมายความว่าอย่างไรสามารถอ่านจากคู่มือต้นฉบับที่ผมอ้างอิงได้
(
echo fcontext -a -t httpd_var_run_t '/var/www/openshift/broker/httpd/run(/.*)?'
echo fcontext -a -t httpd_tmp_t '/var/www/openshift/broker/tmp(/.*)?'
echo fcontext -a -t httpd_log_t '/var/log/openshift/broker(/.*)?'
) | semanage -i -

chcon -R -t httpd_log_t /var/log/openshift/broker
chcon -R -t httpd_tmp_t /var/www/openshift/broker/httpd/run
chcon -R -t httpd_var_run_t /var/www/openshift/broker/httpd/run

fixfiles -R ruby193-rubygem-passenger restore
fixfiles -R ruby193-mod_passenger restore
fixfiles -R rubygem-passenger restore
fixfiles -R mod_passenger restore

restorecon -rv /var/run
restorecon -rv /opt
restorecon -rv /var/www/openshift/broker/tmp
restorecon -v '/var/log/openshift/broker/user_action.log'
คำสั่งชุดนี้ก็ยังคงเกี่ยวกับ SELinux เช่นกันครับ
ตั้งค่า Config ของ Broker
nano -w /etc/openshift/broker.conf
Gear Sizes
ค่านี้เป็นการกำหนดว่าจะใช้ Gear Sizes ใดบ้างซึ่งจะมี small medium large แต่ผมลองแล้วมันเห็นแค่ small ต้องหาสาเหตุก่อน
# Comma separated list of valid gear sizes
VALID_GEAR_SIZES="small,medium,large"
Cloud Domain
กำหนดชื่อ Domain ของระบบตรงนี้ใช้ example.com
# Domain suffix to use for applications (Must match node config)
CLOUD_DOMAIN="example.com"
MongoDB settings
กำหนดค่าชี้ไปยัง MongoDB ที่เราติดตั้งไว้ ถ้าใช้ในเครื่องเดียวกันก็ใส่ localhost ก็ได้ user และ password ตั้งให้ตรงกับที่ใส่ใน db ตอนสร้าง db name
# Comma seperated list of replica set servers. Eg: "<host-1>:<port-1>,<host-2>:<port-2>,..."
MONGO_HOST_PORT="localhost:27017"

#Mongo DB user configured earlier
MONGO_USER="openshift"

#Password for user configured earlier
MONGO_PASSWORD="openshift"

#Broker metadata database
MONGO_DB="openshift_broker_dev"
Authentication Salt
gen ค่า random สำหรับค่า AUTH_SALT ด้วยคำสั่ง openssl rand -base64 64
AUTH_SALT="Gn2qHLUtPixo/R5A3uFLuAAXi54wyvWnWnmpQT6Jk1apnPVmCmN4LyDY1IPfVf7nU2SpLSpCdyh6ZWEP/2ZlEg=="
Session Secret
gen ค่า random สำหรับค่า SESSION_SECRET ด้วยคำสั่ง openssl rand -base64 64
SESSION_SECRET="TQZQzccUWvVvU8w2Dc3ZAU+0hm2MJCrvcNKUol4nYu+FwDH/Wi4g4JXLttPiA7tKup7poLJNH6RglwRyyhc0TQ=="
ถ้าใครวางแผนทำ broker หลายตัวให้ใช้ค่า SESSION_SECRET เหมือนกันนะครับ
Broker Plugins
เมื่อติดตั้ง OpenShift Origin Broker แล้ว Plugins ต่าง ๆ ยังไม่เปิดใช้เราต้องเข้าไปจัดการอีกนิดหน่อย โดยการ copy จาก config ตัวอย่างแล้วแก้ไขให้ตรงกับระบบของเรา
cd /etc/openshift/plugins.d หลักเราจะใช้ config ต่อไปนี้
openshift-origin-auth-remote-user.conf.example

openshift-origin-dns-nsupdate.conf.example

openshift-origin-msg-broker-mcollective.conf.example
ให้ทำการ copy file ทั้งสามเป็นชื่อใหม่โดยการตัด .example ออก
cp openshift-origin-auth-remote-user.conf.example openshift-origin-auth-remote-user.conf
cp openshift-origin-msg-broker-mcollective.conf.example openshift-origin-msg-broker-mcollective.conf
ให้แก้ไข /opt/rh/ruby193/root/etc/mcollective/client.cfg โดยใส่ชื่อ host เป็น broker.example.com nano -w /opt/rh/ruby193/root/etc/mcollective/client.cfg
topicprefix = /topic/
main_collective = mcollective
collectives = mcollective
libdir = /opt/rh/ruby193/root/usr/libexec/mcollective/
logger_type = console
loglevel = warn

# Plugins
securityprovider = psk
plugin.psk = unset

connector = stomp
plugin.stomp.host = broker.example.com
plugin.stomp.port = 61613
plugin.stomp.user = mcollective
plugin.stomp.password = secret

# Facts
factsource = yaml
plugin.yaml = /etc/mcollective/facts.yaml
sed -i 's/MCOLLECTIVE_CONFIG.*/MCOLLECTIVE_CONFIG=\/opt\/rh\/ruby193\/root\/etc\/mcollective\/client.cfg/g' /etc/openshift/plugins.d/openshift-origin-msg-broker-mcollective.conf
ตั้งค่า DNS plugin
ส่วน DNS plugin เราสร้างเองจากค่าในระบบที่ตั้งไว้ดังนี้
domain=example.com
keyfile=/var/named/${domain}.key
cd /var/named
KEY="$(grep Key: K${domain}*.private | cut -d ' ' -f 2)"
cd /etc/openshift/plugins.d
cat << EOF > openshift-origin-dns-nsupdate.conf
BIND_SERVER="127.0.0.1"
BIND_PORT=53
BIND_KEYNAME="${domain}"
BIND_KEYVALUE="${KEY}"
BIND_ZONE="${domain}"
EOFลองตรวจสอบค่าโดย cat /etc/openshift/plugins.d/openshift-origin-dns-nsupdate.conf ค่าที่ได้หน้าตาประมาณนี้ โดยค่า KEY จะต้องตรงกับระบบ ใน file /var/named/example.com.key
BIND_SERVER="127.0.0.1"
BIND_PORT=53
BIND_KEYNAME="example.com"
BIND_KEYVALUE="ACzOZs/EDNNmNRmojRa25F2QErrVZMLZ+V+Tx765kzEvr1/1a3wtBHBaHJLRyOZ5d3ZGogHLgm2t2B6BnYF8dw=="
BIND_ZONE="example.com"
ตั้งค่า Authentication Plugin
OpenShift สามารถติดต่อขอ Authen ได้หลายแบบ เช่น LDAP Kerberos Momgo Auth และ Basic Auth สำหรับระบบของเราใช้แบบ Basic Auth ก็พอครับ คือผ่านทาง htpasswd
copy config จาก file ตัวอย่าง
cp /var/www/openshift/broker/httpd/conf.d/openshift-origin-auth-remote-user-basic.conf.sample /var/www/openshift/broker/httpd/conf.d/openshift-origin-auth-remote-user.conf
สร้าง user และ password
htpasswd -c /etc/openshift/htpasswd openshift เมื่อสั่งคำสั่งด้านบนจะมีการให้ตั้ง password ใส่ให้ถูกต้องสองครั้งและจำให้ได้ไว้สำหรับ login เข้าหน้าจัดการ Broker
ติดตั้ง Administrative Console
เราสามารถติดตั้ง Administrative Console ไว้สำหรับ monitor ระบบผ่านทางเว็บ ให้ติดตั้งดังนี้
yum -y install rubygem-openshift-origin-admin-console
ตั้งค่า proxy ใน OpenShift server
nano -w /etc/httpd/conf.d/000002_openshift_origin_broker_proxy.conf และให้เพิ่มค่านี้ในส่วนของ <VirtualHost *:443>
ProxyPass /admin-console http://127.0.0.1:8080/admin-console
ProxyPass /assets http://127.0.0.1:8080/assets
เปิด Service
chkconfig openshift-broker on

service openshift-broker start
ทดสอบ REST API
สั่งคำสั่งต่อไปนี้ว่าได้ผลลับธ์ปกติ หรือว่ามี error อะไรหรือไม่ curl -u openshift:openshift http://localhost:8080/broker/rest/api.json
เปิดใช้งาน Apache web Server
chkconfig httpd on
service httpd start
ทดสอบเรียก REST API อีกครั้งคราวนี้ผ่านชื่อ domain curl -u openshift:openshift -k https://broker.example.com/broker/rest/api.json
ติดตั้ง Web Console
* BROKER Host
ติดตั้ง
yum -y install openshift-origin-console
ตั้งค่า
กำหนดให้ Web Console ยืนยันสิทธิแบบเดียวกับ Broker คือ Basic Auth
cd /var/www/openshift/console/httpd/conf.d
cp openshift-origin-auth-remote-user-basic.conf.sample openshift-origin-auth-remote-user-basic.conf
Verify Ruby Bundler
cd /var/www/openshift/console
bundle --local

rake assets:precompile
chown -R apache:apache Gemfile.lock tmp
ดูผลถ้าทำสำเร็จจะขึ้นข้อความ Your bundle is complete! Use `bundle show [gemname]` to see where a bundled gem is installed.
เพิ่ม SESSION_SECRET ใน /etc/openshift/console.conf
ใช้คำสั่งนี้สร้าง key หรือ จะใช่อย่างอื่นสร้างก็ได้ openssl rand -base64 64
SESSION_SECRET="TQZQzccUWvVvU8w2Dc3ZAU+0hm2MJCrvcNKUol4nYu+FwDH/Wi4g4JXLttPiA7tKup7poLJNH6RglwRyyhc0TQ=="
SELinux
setsebool -P  httpd_unified=on \
              httpd_can_network_connect=on \
              httpd_can_network_relay=on \
              httpd_run_stickshift=on \
              named_write_master_zones=on \
              allow_ypbind=on \
              httpd_verify_dns=on \
              httpd_enable_homedirs=on \
              httpd_execmem=on \
              httpd_read_user_content=on
setsebool -P httpd_unified=on \
httpd_can_network_connect=on \
httpd_can_network_relay=on \
httpd_run_stickshift=on \
named_write_master_zones=on \
allow_ypbind=on \
httpd_verify_dns=on \
httpd_enable_homedirs=on \
httpd_execmem=on \
httpd_read_user_content=on
(
echo fcontext -a -t httpd_log_t '/var/log/openshift/console(/.*)?'
echo fcontext -a -t httpd_log_t '/var/log/openshift/console/httpd(/.*)?'
echo fcontext -a -t httpd_var_run_t '/var/www/openshift/console/httpd/run(/.*)?'
) | semanage -i -

fixfiles -R ruby193-rubygem-passenger restore
fixfiles -R ruby193-mod_passenger restore
fixfiles -R rubygem-passenger restore
fixfiles -R mod_passenger restore

restorecon -rv /var/run
restorecon -rv /opt
restorecon -R /var/log/openshift/console
restorecon -R /var/www/openshift/console
เปิดใข้งาน Service
chkconfig openshift-console on
service openshift-console start
ถ้าไม่มีอะไรผิดพลาดตอนนี้ท่านทำฝั่ง Broker Host เสร็จเรียบร้อยแล้ว ท่านสามารถเข้าใช้งานเว็บได้ดังนี้ https://broker.example.com/ ใช้ user ที่สร้างไว้ ในที่นี้ของผมคือ openshift openshift
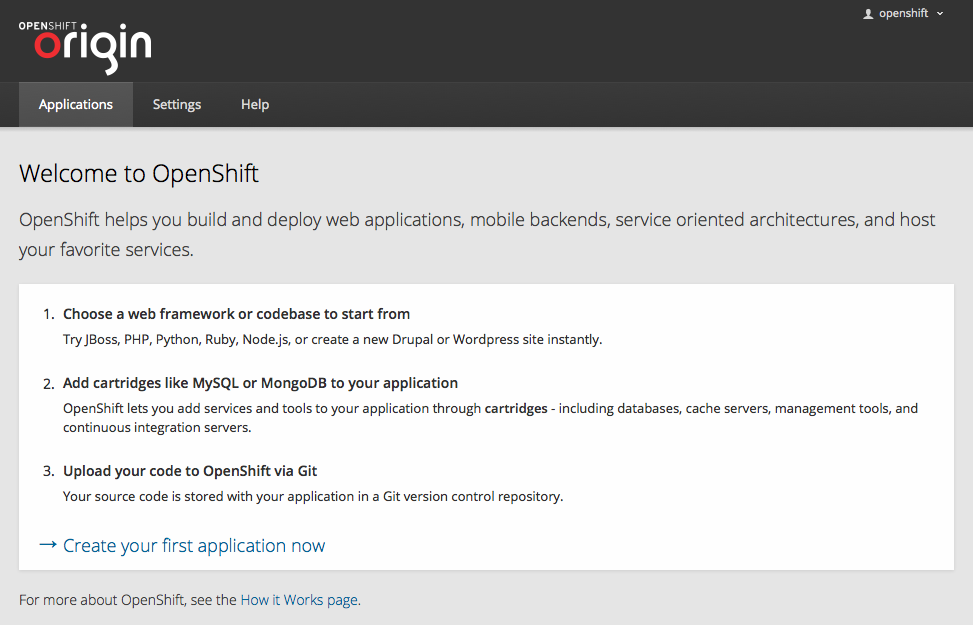
OpenShift Origin Console
รูปที่ 25 OpenShift Origin Console
และเข้า admin-console ผ่านทาง https://broker.example.com/admin-console
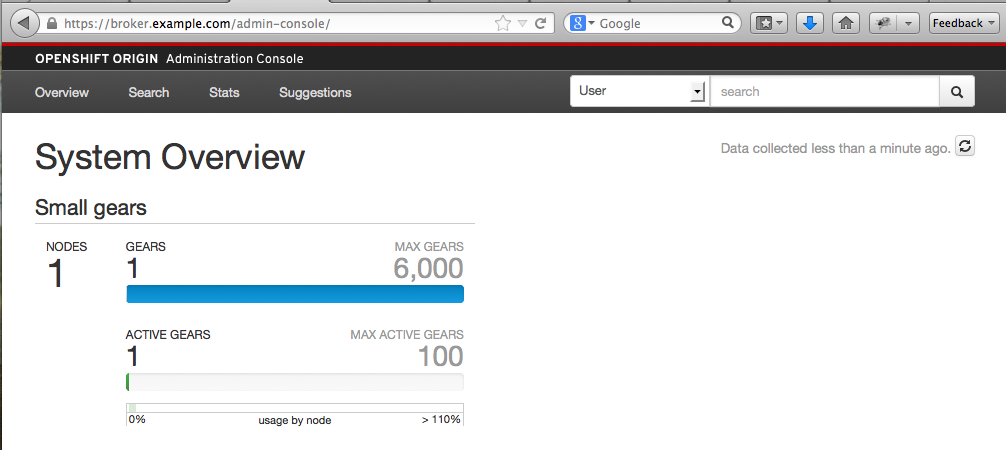
OpenShift Origin Admin Console
รูปที่ 26 OpenShift Origin Admin Console
ถ้ามั่นใจว่าตั้งค่าเสร็จเรียบร้อยก็แนะนำให้ Snapshot เก็บไว้ด้วยนะครับ ถ้าพลาดจะได้กลับมาได้ และลอง reboot ระบบเพื่อดูว่า services ต่าง ๆ start และ ทำงานถูกต้องครบถ้วนหรือเปล่า
ต่อไปจะเป็นการ Setup Node Host
การ Setup Node Host
สำหรับ Node Host ก็ใช้ Guest OS ที่ Clone ไว้ตอนแรก Boot ขึ้นมาแล้วก็ ssh เข้าไปตาม IP ที่ได้รับจาก vboxnet
ADD DNS Reccord
* BROKER Host
ขั้นแรกเลยเมื่อเรามีเครื่อง Node และ ได้รับ IP เรียบร้อยเราต้องทำการลงทะเบียนชื่อ Node กับ DNS Server โดยสั่งทางฝั่ง Broker นะครับ ทำทุกครั้งเมื่อมีการ setup Node ขึ้นมาใหม่
oo-register-dns -h node -d example.com -n 192.168.5.2 -k /var/named/example.com.key
ให้ระบุ IP (-n) และ ชื่อ Host (-d) ของเครื่อง Node ให้ถูกต้อง เมื่อสั่งเรียบร้อยแล้วให้ลอง ping ดูครับ ถ้าไม่มีอะไรผิดปกติก็สามารถระบุ IP กลับมาถูกต้อง
ping node.example.com หรือจะลอง dig node.example.com จะได้ข้อมูลออกมาประมาณนี้
;; QUESTION SECTION:
;node.example.com.        IN    A

;; ANSWER SECTION:
node.example.com.    180    IN    A    192.168.5.2

;; AUTHORITY SECTION:
example.com.        1    IN    NS    ns1.example.com.

;; ADDITIONAL SECTION:
ns1.example.com.    1    IN    A    127.0.0.1
ns1.example.com.    1    IN    A    192.168.5.1
เพิ่มบรรทัดนี้ลงใน /etc/hosts
cat<<EOF>>/etc/hosts
192.168.5.2 node.example.com
127.0.0.1 node.example.com
EOF
ตั้งค่า SSH Key Authentication
* BROKER Host
ขั้นตอนนี้เป็นการตั้งให้เครื่อง Broker และ Node ติดต่อกันผ่าน SSH โดยใช้ Key Auth แทนการใช้ password โดยสั่งคำสั่งต่อไปนี้บนเครื่อง Broker
ssh-copy-id -i ~/.ssh/rsync_id_rsa.pub [email protected]
โดยระบุ IP ของเครื่อง Node ให้ถูกต้อง และถ้ามีการสร้าง Node ใหม่ขึ้นมาก็ให้ทำแบบนี้เช่นกัน แต่ถ้าใช้วิธีการ Clone ก็ไม่ต้องครับ การส่ง key ไปยัง Node ถ้าเรายังไม่เคยเข้า Node จาก Broker มาก่อนจะมีการถามเรื่องการบันทึก known hosts ก็ให้ตอบ yes และใส่ password ให้ถูกต้อง
คราวนี้ก็ลอง ssh เข้าไปยัง Node จาก Broker อีกครั้งด้วยคำสั่งด้านล่าง ถ้าไม่มีอะไรผิดพลาดก็จะเข้าได้โดยไม่ต้องใช้ password วิธีนี้สามารถนำไปใช้งานในชีวิตประจำวันจริง ๆ ได้ครับ
ssh -i /root/.ssh/rsync_id_rsa [email protected]
แค่นี้ระบบ OpenShift Origin ก็จะสื่อสารกันระหว่าง Broker กับ Node ได้ด้วย key แต่ถ้าเราอยากใช้แบบด้านล่างโดยไม่ต้องใช้ password ด้วยต้องทำเพิ่มเติมนิดหนึ่งครับ
ssh [email protected] ให้ใช้คำสั่ง ln -s ~/.ssh/rsync_id_rsa ~/.ssh/id_rsa
กำหนดชื่อเครื่อง Node
* NODE Host ให้มาทางฝั่งเครื่อง Node กำหนด DNS Server ให้ระบบดังนี้ ให้แก้ไข file /etc/resolv.conf
cat <<EOF >/etc/resolv.conf
domain example.com
search example.com
nameserver 192.168.5.1
EOF
ระบุ IP ของเครื่อง Broker ให้ถูกต้อง ทดสอบโดยการสั่ง ping ping broker.example.com ถ้าไม่มีอะไรผิดพลาดจะสามารถส่งคืน IP กลับมาถูกและตอบ ping กลับมาถูก
PING broker.example.com (192.168.5.1) 56(84) bytes of data.
64 bytes from 192.168.5.1: icmp_seq=1 ttl=64 time=0.249 ms
64 bytes from 192.168.5.1: icmp_seq=2 ttl=64 time=1.12 ms
64 bytes from 192.168.5.1: icmp_seq=3 ttl=64 time=0.364 ms
ถ้าจะใช้ dig ต้องลงเพิ่มนิดหนึ่งครับ yum -y install bind-utils ให้เพิ่มค่าใน
/etc/sysconfig/network-scripts/ifcfg-eth0
/etc/sysconfig/network-scripts/ifcfg-eth1
โดยสั่งคำสั่งดังนี้
myip="192.168.5.1"

cat <<EOF>>/etc/sysconfig/network-scripts/ifcfg-eth0
PEERDNS=no
DNS1=${myip}
EOF

cat <<EOF>>/etc/sysconfig/network-scripts/ifcfg-eth1
PEERDNS=no
DNS1=${myip}
EOF
แก้ไข /etc/sysconfig/network nano -w /etc/sysconfig/network แก้ไขค่า HOSTNAME
HOSTNAME=node.example.com
สั่งปรับชื่อเครื่อง
hostname node.example.com logout แล้ว login เข้ามาใหม่ก็จะเห็น prompt ใหม่ตามชื่อเครื่องละ
ติดตั้ง MCollective บน Node Host
* NODE Host ติดตั้ง MCollective เพื่อติดต่อสื่อสารผ่าน ActiveMQ Messenger Server โดยติดตั้ง package ดังนี้
ติดตั้ง
yum -y install openshift-origin-msg-node-mcollective
ตั้งค่า MCollective
โดยใช้คำสั่งต่อไปนี้
cat <<EOF >/opt/rh/ruby193/root/etc/mcollective/server.cfg
topicprefix = /topic/
main_collective = mcollective
collectives = mcollective
libdir = /opt/rh/ruby193/root/usr/libexec/mcollective
logfile = /var/log/mcollective.log
loglevel = debug
daemonize = 1
direct_addressing = 1
registerinterval = 30

# Plugins
securityprovider = psk
plugin.psk = unset

connector = stomp
plugin.stomp.host = broker.example.com
plugin.stomp.port = 61613
plugin.stomp.user = mcollective
plugin.stomp.password = secret

# Facts
factsource = yaml
plugin.yaml = /opt/rh/ruby193/root/etc/mcollective/facts.yaml
EOF
ให้ตั้ง User และ Password ให้ตรงกับทาง Broker
เปิดใช้ Service
chkconfig ruby193-mcollective on
service ruby193-mcollective start
ถึงตอนนี้ให้ไปทาง Broker host แล้วพิมพ์คำสั่งตรวจสอบว่าเห็นกันหรือยังดังนี้
mco find

or

oo-mco find
และลอง ping ดู
mco ping

or

oo-mco ping
และ ดูรายละเอียดของ node
mco inventory node.example.com

or

oo-mco inventory node.example.com
คำสั่งควรจะ work นะครับถ้าไม่ work ต้องไล่ดูว่าทำอะไรผิดหรือเปล่า แต่ปัญหาที่ผมพบบ่อยสุดคือเวลาไม่ตรงกันครับระหว่าง broker กับ node ต้อง restart ntpd ดูถ้ายังไม่ได้ก็ไล่ config ครับ
ติดตั้ง Node Packages
เป็นการติดตั้งแกนระบบของ OpenShift Origin Node Host * NODE Host
ติดตั้ง
ติดตั้ง Package ต่อไปนี้สำหรับติดตั้งแกนระบบของเครื่อง Node
yum -y install rubygem-openshift-origin-node \
               rubygem-passenger-native \
               openshift-origin-port-proxy \
               openshift-origin-node-util \
               rubygem-openshift-origin-container-selinux \
               rubygem-openshift-origin-frontend-apachedb \
               rubygem-openshift-origin-frontend-apache-mod-rewrite \
               rubygem-openshift-origin-frontend-nodejs-websocket
echo "ServerName node.example.com" > /etc/httpd/conf.d/000001_openshift_origin_node_servername.conf
ตั้ง Firewall สำหรับ Proxy
iptables -N rhc-app-comm
iptables -I INPUT 4 -m tcp -p tcp --dport 35531:65535 -m state --state NEW -j ACCEPT
iptables -I INPUT 5 -j rhc-app-comm
iptables -I OUTPUT 1 -j rhc-app-comm

service iptables save
ติดตั้ง Cartridges
Cartridges คือชิ้นส่วนที่ผู้ใช้ PaaS นำมาประกอบใช้งานเป็น Application Gear เช่น ภาษาต่าง ๆ PHP RUBY JAVA Database ต่าง ๆ เช่น MySQL MongoDB MariaDB ถ้าวางแผนที่จะมีหลาย Node ต้องติดตั้ง Cartridges ให้เหมือนกันทุก Node นะครับส่วนจะมี Cartridges อะไรให้ใช้บ้างนั้นลองสั่ง
yum search origin-cartridge ตัวอย่างผมลงมี Cartridges ดังนี้
yum -y install  openshift-origin-cartridge-cron \
                openshift-origin-cartridge-haproxy \
                openshift-origin-cartridge-php \
                openshift-origin-cartridge-mysql\
                openshift-origin-cartridge-mongodb\
                openshift-origin-cartridge-nodejs \
                openshift-origin-cartridge-phpmyadmin
ตามตัวอย่างก็ใช้เวลานานหน่อยถ้าใครเน็ทไม่แรงก็เลือกสักตัวสองตัวเพื่อทดสอบก็พอครับ แต่ cron ต้องลงก่อนเลยนะครับอย่าลืม
เมื่อติดตั้งเสร็จเรียบร้อยให้สั่ง install cartridges ด้วยคำสั่งด้านล่าง ถ้าสำเร็จจะคืนค่าว่า succeeded กลับมา
/usr/sbin/oo-admin-cartridge –recursive -a install -s /usr/libexec/openshift/cartridges/
จัดการ firewall และ services ที่จำเป็น
lokkit --service=ssh
lokkit --service=https
lokkit --service=http
lokkit --port=8000:tcp
lokkit --port=8443:tcp

chkconfig httpd on
chkconfig network on
chkconfig sshd on
chkconfig oddjobd on
chkconfig openshift-node-web-proxy on
ตั้งค่า Multi-Tenancy บน Node Host
* NODE Host
Install augeas tools
augeas เป็นเครื่องมือสำหรับใช้แก้ไขค่า config file แบบง่าย ๆ (ถ้าเข้าใจมันนะ) ซึ่งไม่ได้รู้จัก config ทั้งหมดหรอก ถ้าอยากรู้ว่ามีอะไรบ้างลองเข้าไปอ่านในเว็บของ augeas ดูครับ http://augeas.net
yum -y install augeas
Configure PAM Modules
แก้ไขค่าเกี่ยวกับ PAM ถ้าอยากรู้ว่าแก้อะไรบ้างก็ลองไล่อ่านดูครับ
cat <<EOF | augtool
set /files/etc/pam.d/sshd/#comment[.='pam_selinux.so close should be the first session rule'] 'pam_openshift.so close should be the first session rule'
ins 01 before /files/etc/pam.d/sshd/*[argument='close']
set /files/etc/pam.d/sshd/01/type session
set /files/etc/pam.d/sshd/01/control required
set /files/etc/pam.d/sshd/01/module pam_openshift.so
set /files/etc/pam.d/sshd/01/argument close
set /files/etc/pam.d/sshd/01/#comment 'Managed by openshift_origin'

set /files/etc/pam.d/sshd/#comment[.='pam_selinux.so open should only be followed by sessions to be executed in the user context'] 'pam_openshift.so open should only be followed by sessions to be executed in the user context'
ins 02 before /files/etc/pam.d/sshd/*[argument='open']
set /files/etc/pam.d/sshd/02/type session
set /files/etc/pam.d/sshd/02/control required
set /files/etc/pam.d/sshd/02/module pam_openshift.so
set /files/etc/pam.d/sshd/02/argument[1] open
set /files/etc/pam.d/sshd/02/argument[2] env_params
set /files/etc/pam.d/sshd/02/#comment 'Managed by openshift_origin'

rm /files/etc/pam.d/sshd/*[module='pam_selinux.so']

set /files/etc/pam.d/sshd/03/type session
set /files/etc/pam.d/sshd/03/control required
set /files/etc/pam.d/sshd/03/module pam_namespace.so
set /files/etc/pam.d/sshd/03/argument[1] no_unmount_on_close
set /files/etc/pam.d/sshd/03/#comment 'Managed by openshift_origin'

set /files/etc/pam.d/sshd/04/type session
set /files/etc/pam.d/sshd/04/control optional
set /files/etc/pam.d/sshd/04/module pam_cgroup.so
set /files/etc/pam.d/sshd/04/#comment 'Managed by openshift_origin'

set /files/etc/pam.d/runuser/01/type session
set /files/etc/pam.d/runuser/01/control required
set /files/etc/pam.d/runuser/01/module pam_namespace.so
set /files/etc/pam.d/runuser/01/argument[1] no_unmount_on_close
set /files/etc/pam.d/runuser/01/#comment 'Managed by openshift_origin'

set /files/etc/pam.d/runuser-l/01/type session
set /files/etc/pam.d/runuser-l/01/control required
set /files/etc/pam.d/runuser-l/01/module pam_namespace.so
set /files/etc/pam.d/runuser-l/01/argument[1] no_unmount_on_close
set /files/etc/pam.d/runuser-l/01/#comment 'Managed by openshift_origin'

set /files/etc/pam.d/su/01/type session
set /files/etc/pam.d/su/01/control required
set /files/etc/pam.d/su/01/module pam_namespace.so
set /files/etc/pam.d/su/01/argument[1] no_unmount_on_close
set /files/etc/pam.d/su/01/#comment 'Managed by openshift_origin'

set /files/etc/pam.d/system-auth-ac/01/type session
set /files/etc/pam.d/system-auth-ac/01/control required
set /files/etc/pam.d/system-auth-ac/01/module pam_namespace.so
set /files/etc/pam.d/system-auth-ac/01/argument[1] no_unmount_on_close
set /files/etc/pam.d/system-auth-ac/01/#comment 'Managed by openshift_origin'
save
EOF
cat <<EOF > /etc/security/namespace.d/sandbox.conf
# /sandbox        \$HOME/.sandbox/      user:iscript=/usr/sbin/oo-namespace-init       root,adm,apache
EOF

cat <<EOF > /etc/security/namespace.d/tmp.conf
/tmp        \$HOME/.tmp/      user:iscript=/usr/sbin/oo-namespace-init root,adm,apache
EOF

cat <<EOF > /etc/security/namespace.d/vartmp.conf
/var/tmp    \$HOME/.tmp/   user:iscript=/usr/sbin/oo-namespace-init root,adm,apache
EOF
Enable Control Groups (cgroups)
* NODE Host เปิดใช้งาน cgroups เพื่อจำกัดการเข้าถึงทรัพยากรของเครื่อง ง่ายต่อการควบคุมแต่ละผู้ใช้งาน
chkconfig cgconfig on
chkconfig cgred on
service cgconfig restart
service cgred restart
Configure Disk Quotas
* NODE Host
เปิดการใช้งาน disk quota เพื่อจำกัดการใช้งานพื้นที่ disk บนเครื่องสำหรับแต่ละ user โดยการแก้ไข /etc/fstab แล้วใส่ option usrquota ในบรรทัดของ / (ถ้าท่านออกแบบระบบเองก็ให้ระบุไปที่ partition ที่มี /var/lib/openshift อยู่นะครับ )
nano -w /etc/fstab
/dev/mapper/VolGroup-lv_root / ext4 defaults,usrquota 1 1
หลังจากนั้นให้ทำการ remount / ใหม่ เพื่อเปิดใข้งาน option ที่ตั้งไว้ mount -o remount / update database โดยสั่ง quotacheck -cmug / การกำหนดค่าอย่างละเอียดสามารถเข้าไปแก้ไขได้ที่ nano -w /etc/openshift/resource_limits.conf
Configure SELinux and System Control Settings
* NODE Host
OpenShift จะเน้นเรื่องการใช้งาน SELinux ดังนั้นต้องแน่ใจว่าเราได้กำหนดค่าต่างอย่างครบถ้วน เพราะถ้าตั้ง SELinux ไม่ถูกนี่เราไม่สามารถเรียกใช้งานได้เลยนะครับ ให้ทำตามทีละขั้นดังนี้
Configuring SELinux
setsebool -P httpd_unified=on httpd_can_network_connect=on httpd_can_network_relay=on \
httpd_read_user_content=on httpd_enable_homedirs=on httpd_run_stickshift=on \
allow_polyinstantiation=on httpd_run_stickshift=on httpd_execmem=on
restorecon -rv /var/run
restorecon -rv /usr/sbin/mcollectived /var/log/mcollective.log /var/run/mcollectived.pid
restorecon -rv /var/lib/openshift /etc/openshift/node.conf /etc/httpd/conf.d/openshift
Configuring System Control Settings
แก้ไขค่าของ sysctl.conf ด้วยคำสั่งดังนี้
cat <<EOF | augtool
set /files/etc/sysctl.conf/kernel.sem "250  32000 32  4096"
set /files/etc/sysctl.conf/net.ipv4.ip_local_port_range "15000 35530"
set /files/etc/sysctl.conf/net.netfilter.nf_conntrack_max "1048576"
save
EOF
update ค่าที่แก้ไขไป อาจจะมีบางค่า error ก็ไม่ต้องตกใจครับ sysctl -p /etc/sysctl.conf
Configure SSH, OpenShift Port Proxy, and Node Configuration
* NODE Host เพิ่มค่าให้กับ ssh server เพื่อให้สามารถติดต่อผ่านทาง git ได้ ใช้คำสั่งดังนี้
cat <<EOF >> /etc/ssh/sshd_config
AcceptEnv GIT_SSH
EOF
ปรับค่า MaxSessions ให้ ssh server เป็น 40 ถ้าใข้งานจริงก็ต้องดูความเหมาะสมตามเนื้องานครับ
cat <<EOF | augtool
set /files/etc/ssh/sshd_config/MaxSessions 40
save
EOF
Initialize Traffic Control
* NODE Host chkconfig openshift-tc on
Configuring the Port Proxy
* NODE Host
เปิด firewall ตั้งค่า service และเริ่มใช้งาน OpenShift Proxy ซึ่งใช้สำหรับติดต่อสื่อสารภายในไปยัง gear ต่าง ๆ
lokkit --port=35531-65535:tcp
chkconfig openshift-port-proxy on
service openshift-port-proxy start

chkconfig openshift-gears on
Configuring Node Settings for Domain Name
* NODE Host เป็นการกำหนดค่าให้กับ Node ถ้า set node อื่น ๆ เพิ่มก็ตั้งชื่อ และ IP ให้ถูกต้องครับ nano -w /etc/openshift/node.conf
PUBLIC_HOSTNAME="node.example.com"
PUBLIC_IP="192.168.5.2"
BROKER_HOST="broker.example.com"
CLOUD_DOMAIN="example.com"
Update login.defs
* NODE Host กำหนดค่า uid ตำสุดของระบบให้สอดคล้องกับ GEAR_MIN_UID ใน node.conf
cat <<EOF | augtool
set /files/etc/login.defs/UID_MIN 500
set /files/etc/login.defs/GID_MIN 500
save
EOF
Update the facter Database
* NODE Host จริง ๆ ตรงนี้จะมี crontab คอยอัปเดทให้แต่ถ้าอยากให้อัปเดทตอนนี้เลยก็สั่งดังนี้ /etc/cron.minutely/openshift-facts
Reboot Node Host
* NODE Host
เมื่อทำทุกอย่างสำเร็จเสร็จสิ้นก็ถึงคราวทดสอบจริง ๆ ก็ให้ reboot หนึ่งรอบครับ หลังจาก reboot มาแล้วแนะนำให้ snapshot VM ไว้ด้วยนะครับเผื่อมีอะไรผิดพลาดจะได้กลับมา หรือจะ snapshot มาทีละขั้นตอนข้างบนก็ได้ และ ถ้าเห็นว่าเป็น node ที่สมบุรณ์แล้วก็ให้ทำการ clone VM ไปเป็น node2 node3 ต่อไปแต่อย่าลืมตามไปแก้ตามที่เคยแนะนำในหัวข้อ clone ในบทความนี้ในตอนต้นนะครับ
ทดสอบระบบ
* Host OS
การทดสอบระบบเราสามารถทดสอบบนเครื่อง Host OS หรือเครื่องแม่ที่ลง VirtualBox ไว้นั่นเอง ของผมก็เป็น OS X ผมก็สามารถทดสอบบน Browser ได้ โดยการตั้งค่า DNS Server ของ OS X ให้ชี้ไปยังเครื่อง broker ครับเมื่อกำหนด ค่า DNS Server เรียบร้อยก็เปิด Browser ขึ้นมาใส่ URL ดังนี้
https://broker.example.com
แล้วใช้ login password ที่ตั้งไว้ด้วย htpasswd ในที่นี้คือ openshift:openshift
ถ้าหาก Broker และ Node สามารถเชื่อมต่อกันได้อย่างถูกต้องท่านจะเห็นรายการ Cartrigdes ประมาณนี้
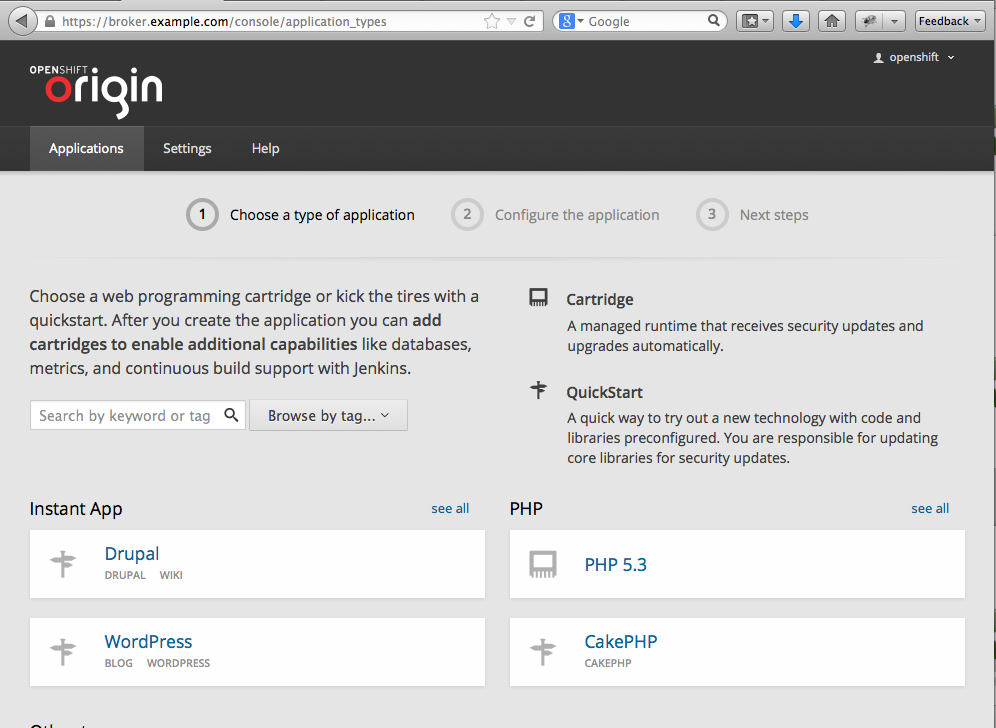
Cartrigde list
รูปที่ 27 รายการ Cartrigde ที่มีทางฝั่ง Node
ส่วนการใช้งานถ้ามีโอกาสจะเขียนกันอีกสักยกขอตัวไปศึกษาก่อนครับ